Sunday, October 28, 2018

My Ancient Roman Invention

I have a couple buddies who are a lot smarter than I am, and we got into a conversation the other day about how the ancient Romans were able to build aqueducts that were miles long, with lots of hills and valleys in the way, and know that the bottom end was going to be just enough lower than the top end to make the water flow nicely.


Turns out they did it by measuring in baby steps, sighting along a level plane at a measuring stick, a bit further up or down the grade. Kind of like this:


In order to shoot a perfectly horizontal line, they needed a tool, so to help them out, I set about inventing one. The first thing that came to mind was of course water, which is always level (found out later that they did have one tool that involved sighting over a pan of water, but I didn't know that and besides, I think mine is more elegant..)

Gary's Ancient Leveling Transit

H
ere's my prototype:


Since I didn't have an assistant, I propped a measuring stick up at a slightly different elevation and taped yardsticks to it.


First, I calibrated the stick by placing it right next to the transit and marking it at the same height as the nail points.  Due to uneven density of the wood, one point was a little higher than the other when I spun it around to check against the first mark, so I added a Roman coin (actually a washer) to balance it out.

Sorry, bad picture, but the stick is in my left hand and you can make out the marks and the washer if you squint.
Here you can see that the water is level, even though my tripod is not.


First attempt was a little shaky in a slight breeze, so I attempted to steady it with my fingers.


Maybe what was needed was a more viscous pool, like mercury (Wikipedia says the Romans had it), or perhaps olive oil?  I was too cheap to try that, so made a batch of Roman gravy, with flour, butter, water, a bit of milk and a dash of Mediterranean sea salt (because why wouldn't you?)

Even more effective was a couple of movable stops I attached to the bowl, just kissing the floating beam to keep it from moving in the wind.


If I had an assistant (a trusted slave) he could slide his finger down the yardstick until I told him he was lined up with my nail points, and one of us would record the rise (XVIII inches in this case).

The top of the blue tape on the stick is the "reference"- the same height as my nail points

W
hen we laid out my house, we used a fancy expensive laser version, but the principle was the same, and my brilliant engineer buddy assures me that accurate elevation surveying, including over long distances, is still done in roughly the old Roman way, one sight at a time, inch-worming over hill and dale.


Oh, and Bigfoot was back today, hopefully dining on some of my delicious gophers.


Wednesday, October 24, 2018

Air Conditioner.. Just in Time for Winter!


When I decided to air condition this off-the-grid house, I felt I needed to take it easy on my electrical system and installed a "mini-split' unit in the living room instead of central air.


It does a pretty good job on most of the house, but sometimes doesn't quite make it all the way to the bedroom at the other end of the house.

So I bought a little window unit on Craigslist for 40 bucks and stuck it in the bedroom window.


Unfortunately, I had to block off the only window in the room, so this was not a good solution.

Time to bite the bullet and chop a hole in my lovely wall...


A little framing...


A little plaster work...

 
Bedside remote

And we're in business!


Wired it up outside...


Until it's needed, the AC will hide behind a picture of a big oak tree.  I made the frame from some ancient fence boards.


While I was in a framing mood, I added a bonus picture to the living room.


Thanks to Merrily for the pictures!


Tuesday, September 4, 2018

A New Look for Kini

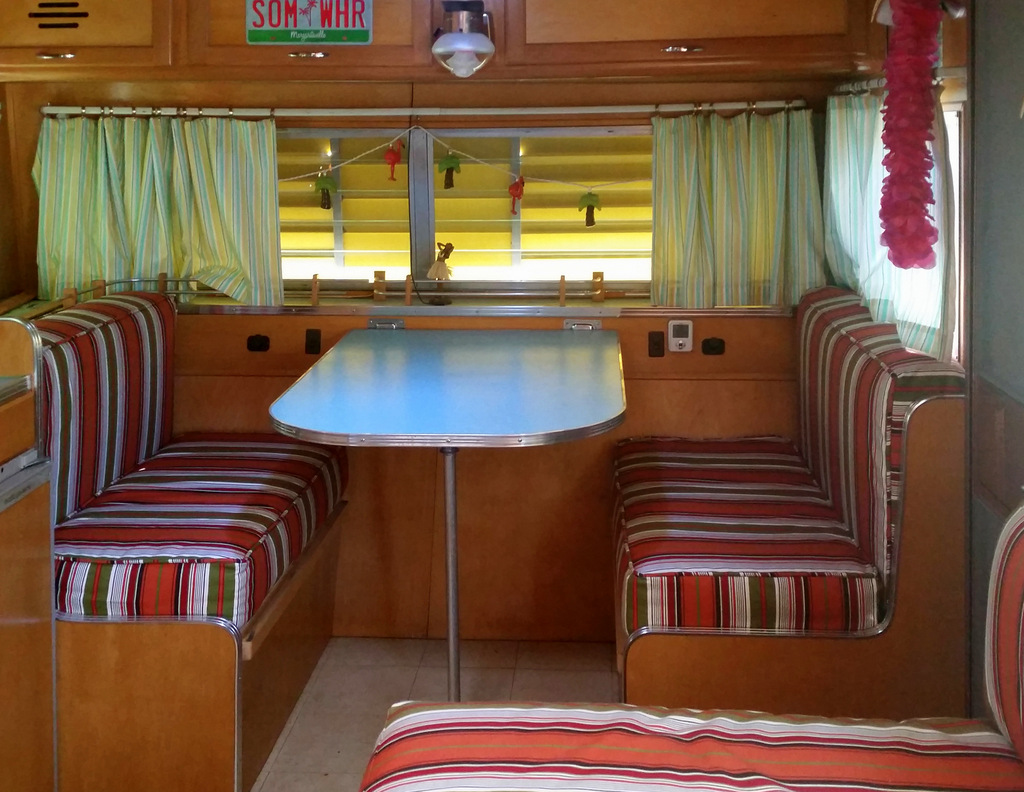
Kini's my vintage travel trailer.  (The name means "Tin Can" in Hawaiian.)

The upholstery was starting to look a bit shabby and faded, and besides, I wanted a different bed arrangement. Having a couch is all well and good, but when I travel alone, I rarely sit on it, and it's a pain having to convert it into a bed every night, so I widened the seat to twin-bed size and reduced the backrest.

Here's how it used to look:


And here's the new look:


 In the event a double bed is needed, the twin bed will pull out and the back rests will drop into the space.


I split the backrest into two pieces that can be easily stashed out of the way. I'll leave the twin bed made up all the time unless I'm at a show or rally and feel I need to be tidy.


The house got a little out of control during the process...


Carefully posed candid selfie

Since I was redoing the bed, I needed to re-do the dinette as well, and for these cushions, decided to put piping around the edges.  Didn't bother with that on the bed, because... it's a bed.

30 yards of homemade "piping"


The "Guest Bed."

Getting ready to take a little road trip, so the New Look will get a good test.


Saturday, July 28, 2018

View From the Top

Good buddy and Grandson-I-Never-Had Brian Anglin came to visit me and he brought his drone. Here's what my little homestead looks like from the sky.
Thanks, Brian!


Thursday, June 28, 2018

Latest Project

Note: If you are seeing this in email, click on the blue title to go to the blog, and REMEMBER, this email is generated by Blogger and replies do not come to me. If you want to contact me, write to me directly at campobungalow@hughes.net
Thanks,
The Management
Just finished another bookcase for the living room. I've been trying to come up with something that I could easily access from my chair. Not that I'm lazy (OK I am) but I didn't want to have to get up from the chair and reach around in front of a normal bookcase.

This ought to do the job.


In looking around for inspiration, I came across this, which gave me the idea of "side shelves."  That would solve the problem of easy access from the chair for the current book, current beverage, and glasses.  Also a magazine rack at the bottom big enough for crossword puzzles.  Still need to install a little rod to keep the mags from falling out.


As usual, this one started out with an Adobe Illustrator drawing:


Carved "Roycroft Roses" designed in the early 1900s by a guy named Dard Hunter. You often see this rose and variations of it in Arts & Crafts graphics.


The side cabinets are easily removable to make it easier to haul off to the Goodwill when I'm dead...:)
Found these lovely handmade dragonfly tiles from a small shop in Ohio


Stay Tuned!


Sunday, April 29, 2018

Watching High Drama from my back porch

Sometimes it gets exciting out here in the boondocks.  Check out this 3-minute video. 
Turn up the volume and go to full screen if you can.


Friday, April 13, 2018

Redneck Recliner

During construction of the house, the carpenters taught us how to kick back in a wheelbarrow.


Good Bro-in-Law Danny liked it so much, he and sweet wife Jo bought me a new one as a housewarming gift.


When Danny came to visit me recently, we decided to get fancy and we made wood slats to go in the new "redneck recliner."  Each slat had to be scribed, beveled and fitted, one at a time, so it kept us entertained for several hours and several beers.


Varrnishing all four sides of the wooden handles presented a challenge, solved by these little jigs.
Dan suggested I paint the tub in a cool brownish red called "Caliente," which was Benjamin Moore's Color of the Year this year, but my local farm supply didn't have that, so I got something I like just as much if not better:

International Harvester Red
An appropriate color for a Redneck Recliner!
(Sorry Kenny and Joy... John Deere Green was my first idea, but the red goes better with my rug...)

Between what my mama taught me and a few YouTube videos, I managed to make some cushions to finish off the project. Surprisingly comfortable!


My ship

Danny wasn't the only one to visit me recently.  Old buddy Bruce came down from Washington for a few days and we made a Plexiglas case for the ship model he built for me a few years ago.  It's a 52" long replica of the destroyer I served on in the 60s.  Went around the world in that ship.


The beautifully detailed model occupies a place of honor in my study/guest room.


Gluing Plexiglas requires injecting water-thin glue using a syringe and needle.  Luckily Bruce is a retired veterinarian.


USS Davis DD 937 as configured for Vietnam, 1966